An Easy, Step-by-Step Guide to Installing ERPNext with Docker
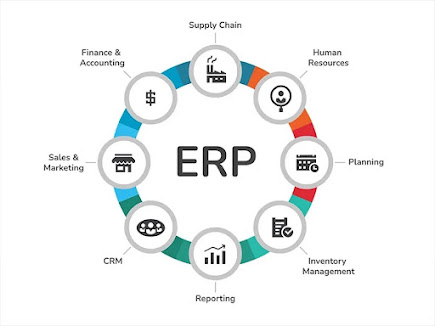
Are you looking for an easy way to Install ERPNext? Then look no further! In this blog post, we will be discussing how to use Docker to quickly and easily set up your own ERPNext instance. This guide is designed for anyone wanting to get started with ERPNext, from newbies who are just getting their feet wet in the world of enterprise resource planning (ERP) software, to experienced professionals looking for a refresher. Let's dive in!
What is Docker?
For those unfamiliar with the term, Docker is a platform that allows you to deploy applications in isolated containers. It simplifies the process of installing and managing software by providing a consistent environment regardless of your operating system. This makes it ideal for running complex applications like ERPNext without needing to worry about any hardware or software compatibility issues.
Setting Up Your Environment
The first step in setting up your environment is downloading and installing the latest version of Docker Desktop on your computer. This can be done by visiting the official website (https://www.docker.com/products/docker-desktop). Once installed, you should make sure that all relevant ports are open on your computer’s firewall so that Docker can communicate with external services.
Installing ERPNext with Docker
Once you have everything set up, it's time to install ERPNext with Docker! First, open a terminal window and run the following command: $ docker run -p 80:80 --name next -d frappe/erpnext . This will start downloading and running a container based on Frappe’s pre-built image of ERPNext. The container will automatically start up once it has finished downloading and will create an instance of ERPNext at http://localhost:80/. You can also access this page from any other device on the same network using its IP address instead of “localhost” (e.g., http://192.168.1.13:80/).
Once the instance is running, you can log in using “Administrator” as both username and password (this can be changed later). After logging in, you have access to all of ERPNext’s features and functions, including creating reports, managing users, configuring accounts etc., allowing you to get started right away!
To stop or restart your instance at any time simply use these commands respectively: $ docker stop erpnext; $ docker start next. You can also remove the instance completely by using this command: $ docker rm erpnext .
Conclusion:
Enterprize resource planning (ERP) software like ERPNext provides valuable insights into data analytics which can help businesses make smarter decisions and optimize their operations more efficiently than ever before. Installing it doesn't have to be complicated though – thanks to tools like Docker – enabling anyone from beginners all the way up to experienced professionals get up and running quickly so they can start reaping its benefits right away! So don't wait any longer – give it a try today!


Comments
Post a Comment